categories
blog
Christmas Lights
Posted on by Douglas B
I can't believe I haven't updated this page in so long. Sorry about that. We'll since it is the Christmas Season I guess we should talk about shooting Christmas lights. Personally, I don't think there is a right way or a wrong way to take pictures of Christmas lights. A quick search on the Internet or Pintrest will give you a plethora of results, but ask 100 photographers how to do something and you get 100 different answers. That's just the way we are.
For me I prefer that my lights "twinkle". OK, you are asking how do you make a light "twinkle" in a still photograph? Obviously, you can't have motion in a still image but you can produce the appearance of motion and sometimes that is even better. Take a look at the Texas Grace Christmas Card below.
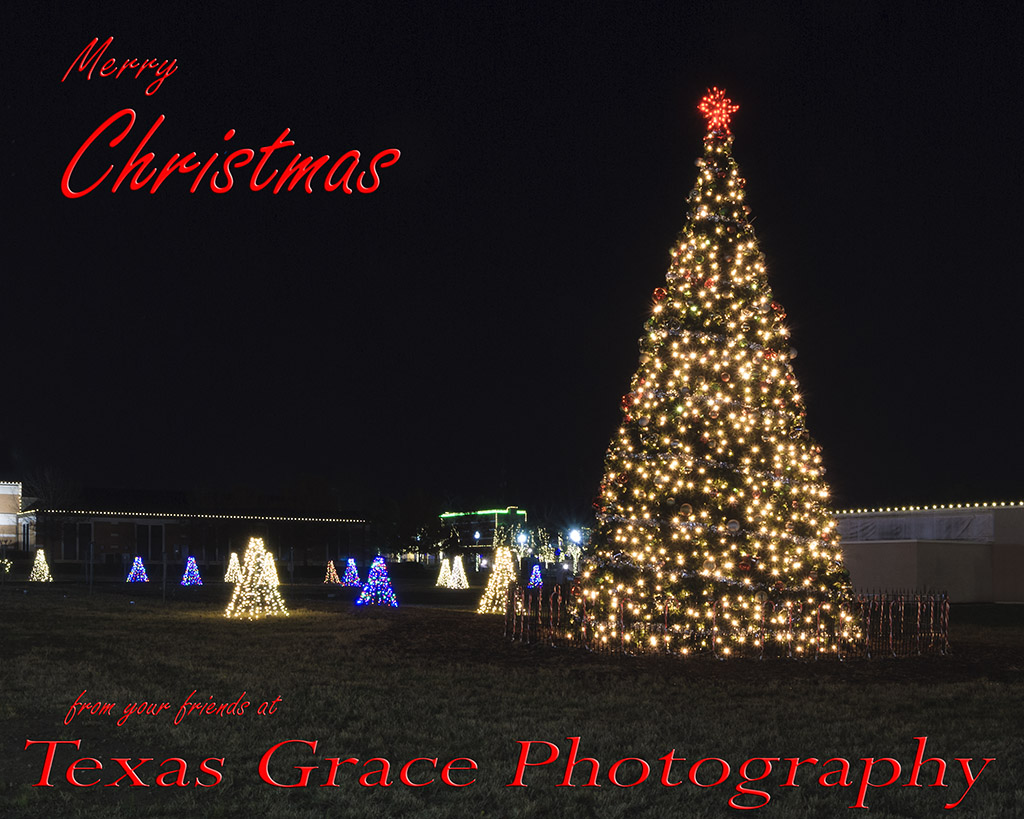
Notice how each light is like a tiny star bursts? Believe it or not this was not done post process in Photoshop nor did I use any fancy lens filter to create this effect.
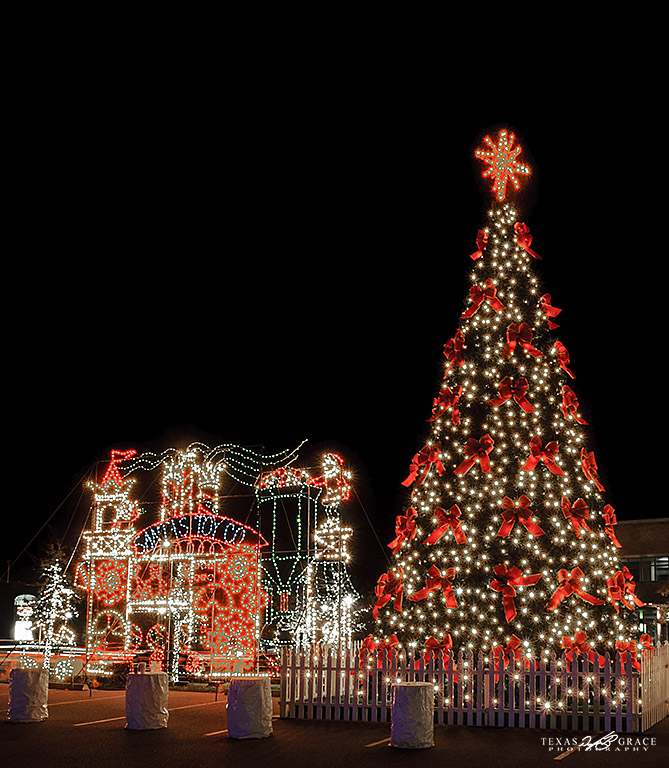
The secret to creating star bursts is all done on camera by adjusting time, exposure, f~stop and of course your ISO.
TIME
A lot of photographers and Quick Internet Tips will tell you that you need to take the picture around sunset to get the best results. Well, that depends on what you want to take a picture of I say. I'm not interested in taking a picture of the sky or of the building in this case. I'm more interested in capturing the lights themselves and making the image "pop". For this I chose to take my Christmas light picture when it is full dark.
ISO and VIBRANCY
Well, since it is full dark you want to use a high ISO setting, right? Nope, the higher the ISO the more "noise" you introduce into your images. you actually want to use a rather low ISO. I find ISO 100 works the best. What ISO denotes is how sensitive the image sensor is to the amount of light present. The higher the ISO, the more sensitive the image sensor and therefore the more "noise" that is introduced. This may not be a problem if you are going to make small prints or small web images but if you want to get good, sharp, clear prints the lower ISO works the best as a standard rule of thumb.
Let's not forget one of the more useful settings on today's pro-sumer DSLRs and that is the Vibrancy setting. On Nikon cameras, usually buried somewhere in the additional custom settings menu, is a little used seldom understood "vibrancy setting". Sometimes this is expressed as "Portrait", "Landscape", "Standard" or even "VI". You want to select the most vibrant setting available. There is good reason for this if you consider what you are taking a picture of. You aren't taking a portrait of people where skin tone is of the utmost importance. You are taking a picture of lights. These lights are usually white, yellow, green and red. RGB rules in this instance, you want very vibrant reds and greens, you want stark whites and warm yellows.

Notice in the image above that the green lights are GREEN, the reds RED, the white lamp posts WHITE and the yellows YELLOW? Vibrancy did this for me. Some DSLRs do not have this vibrancy setting but that's OK, a little tweaking in Photoshop or Lightroom will take care of this for you. I do want to point out the green color cast in the parking garage lights in the background. This is caused by the type of lights they use in this garage. You have two choices here. You can either learn to live with it OR create a mask in Photoshop to change the color.
Shutter Speed
Set your shutter speed to 30 seconds. That's right 30 seconds, it is expressed on the camera as 30". This means you need a steady tripod, you cannot hold it by hand or even using a mono-pod. You must use a tripod. Now I'm old school so I prefer my Bogen tripod but use whatever works for you. The image below illustrates what happens if you try to use a mono-pod. I don't care how steady you are you will move over the 30 second exposure and when you do you create a motion blur.

F~STOP
This is where the magic starts to happen. This is where the "twinkle" is formed. The f~stop works in conjunction with the shutter speed to create the star burst effect. I prefer to use F22, but in truth the star burst effect will occur anywhere between F18 and higher. The smaller the aperture (higher f-stop number) the greater the start burst effect.
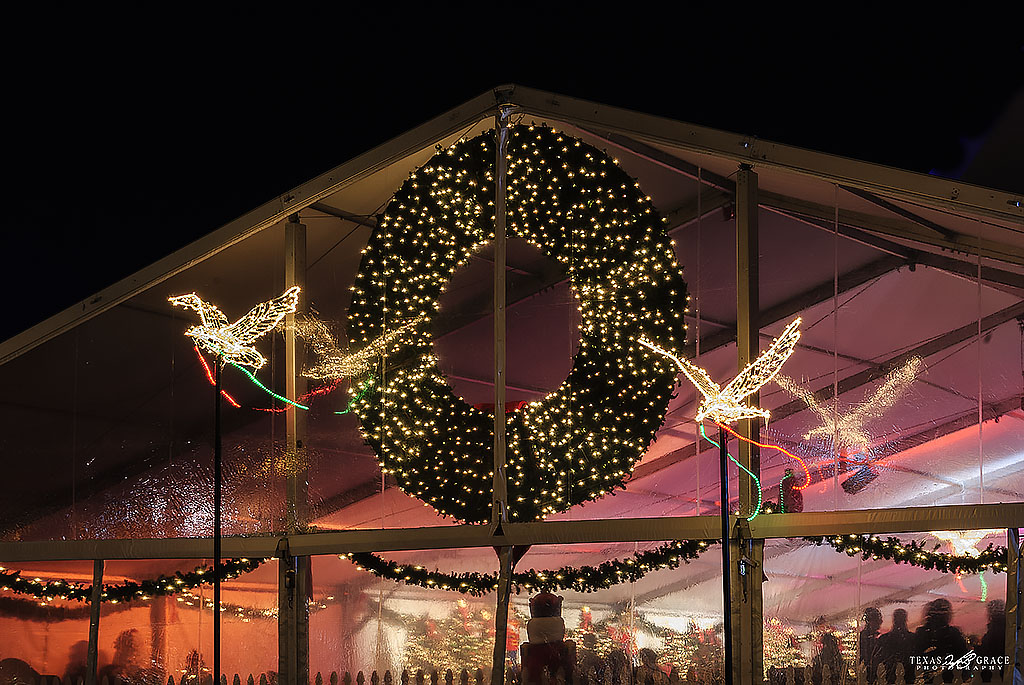
To illustrate this point look closely at the image above. It just isn't as "good" as the others. The "Twinkle" isn't as strong. The settings for this image was F18, ISO 100, Shutter speed 11 seconds. Oh, that crinkling you see is not a camera fault. The walls of this building are actually plastic sheeting, it's a temporary ice skating rink.
So now you know who to make the "twinkle, twinkle little star". Go out and shoot something!
End of ArticleWorkshops and TFP
Posted on by Douglas
I recently attending a “Meet up” with one of the photography groups I belong to. This was billed as a “family friendly patriotic pin up shoot”. The organizers did a bang up job of renting a local studio and getting the services of some agency models donated as well as a MUA and a classic Dakota Challenger to shoot with!
Let me explain a bit about workshops and Time For Print (TFP). First off there is a big difference between a “workshop” and a TFP shoot in the purpose of each. A workshop is just that, it is a learning experience. If you pay someone who is conducting a workshop you better have learned something and they better have taught you something.
A workshop does not need to be a formal educational experience such as those put on by Kelby Training and conducted with leading industry experts like RC Concepcion, in a classroom setting. Far from it, these workshops can be an informal training session such as those put on by Mike North of the Houston Glamour Club or my good friends over at The Portfolio Builders. These are informal training along with the opportunity to shoot a model or two in order to practice the concepts you’ve just learned.
At a workshop there are no “model releases” per se, but an implied “model release” exists under US Copyright and “Fair Use”. In this situation it is understood by both the model and the photographer that the photographer may use the photos in his/her personal portfolio PERIOD. That’s it, the photographer cannot submit the images for publication nor can he/she use them for their advertising purposes. The model ALWAYS gets a copy of the resulting images for use in his/her personal portfolio and the same restrictions apply to him/her as well.
The purpose of the images from a workshop is to practice the concepts or skills you’ve just learned NOT to get images for publication or release. Now when I say release what I am specifically talking about is submissions other than for publication. Can you use the images and enter them in a photo contest? No. Workshop images are for editorial use only. You and the model cannot receive direct compensation from the use of the images. Winning a photo contest would be compensation. You want to use the images in this manner then HIRE the model and get a written model release.
Time For Print (TFP) Shoots. I dislike TFP, personally but I understand it can be a very beneficially arrangement and in the past I have use it myself. I still do, on a very limited basis, when I’m trying to work out the logistics for a concept shoot or looking for a specific type of look and model. TFP can trace its roots back to the early days of the formation of SAG. Back before digital portfolios would be actors and models needed head shots for ever call they made. These headshots remained with the director or casting agent. They would need specific portfolios for each type of gig they were applying for. You would not show up for a swimsuit gig with only headshots in your portfolio. Subsequently, you would not show up to a casting call for a Betty Crocker shoot with a swimsuit portfolio.
Obviously, printing all these images could be very costly and no one works for free, neither photographer nor model. Thus TFP was born. The model will trade his/her time and talent to the photographer to model in the genre the photographer is looking for and in return the model receives a set number of prints he/she can use in his/her portfolio and for release.
A TFP shoot requires a specific model release outlining how and where the images can be used. Normally, this favors the photographer. The thought behind this is that the photographer is already at the top of his/her trade and the model is not. Thus the model gets dual benefits from not only the prints but also from listing the photographers and MUAs he/she has worked with. Along with this the model gains experience working in many different genre and with many different photographers and MUAs. TFP is also very beneficially to Make-up Artists. How do you think Max Factor started?
In today’s market this TFP has been perverted and is heavily used by amateurs/hobbyist both in front and behind the lens. The thinking seems to be, at least to me, that the model thinks the images belong to them and the photographer is working at the model’s direction and the photographer thinks the images belong to them and the model is working at the photographer’s direction. News flash if neither one of you is at the top of your profession then you both need to come to an understanding of what the purpose of the shoot is and how the images will be used.
By US Copyright law ALL images created by the photographer are the sole property of the photographer. Sorry, but that’s the sad truth of the matter. The photographer still must obtain a written model release to publish and/or release the images. Other than publication or release the use of the images is at the discretion of the photographer as the copyright holder.
So what happens if a model release is not obtained and the photographer somehow gets an image published or otherwise receives compensation from the direct use of the image? Ah, that’s law and as I understand it the model could then file suit to recover fair compensation. This is why publications require a model's release AND if being sold by a third party such as an agency a photographer release, though they would prefer a copyright release.
A copyright holder to an image should refrain from releasing an image that they may want to publish at a later date; not because you can’t publish an image that has be previously release. The true reason behind this is that depending HOW the image was originally released and how it is used it may fall into what is known as “Fair Use” or “Editorial Use” and you, the photographer, get no compensation!!
Let me see if I can give you a real world example. A few years ago a popular men’s magazine was looking for submissions. I wanted to submit but I wanted to “stack the deck” in my favor. I convinced London Andrews, a well-known name in the “adult industry” to pose for me using TFP as the basis. I obtained a model release outlining the specific use of the images. In this model release she would receive a copy of the images I would NOT be submitting that she could use in her personal portfolio. This personal portfolio was defined as private viewing only. She could not post them to her blog or twitter accounts, etc. She could send them to perspective clients (photographers) and agents. I receive the rights to publish and release any image but not advertising or editorial use. This is why when you look at my site you see so few London Andrews images, but you know there has to be multiple sets running around. In this case the model release protects both the model and me from improper exposure or loss of derived revenue.
So what happen if you attend a “shoot” and there is no model release; one of these group photographer shoots that have become so popular or put on by various photo clubs? In this situation implied consent exists in favor of the photographer. Sorry, models it’s true. While the copyright still exist in favor of the photographer I’m betting a good lawyer could present a strong case against the photographer that does not provide fair and reasonable compensation to the model. Also consider where you release photos from these types of shoots, if you even can without a model release. You just happen to create this great image and you release it to Bikes and Babes. This image hurts the model in some way, let’s say reputation and she loses gigs because an image of her appeared in Bikes and Babes. An argument can be made to recover damages.
All I’m really saying here is be careful what you do with images you do not have a proper written release to. If you ever want to work with that model or agent again I would advise treating the model right and getting expressed permission before releasing an image.
I hope this helps some of my readers, especially those using Meetup.com and attending “workshops” and “portfolio shoots”.
End of ArticleSupport and the Good Face
Posted on by DouglasB
I had a huge shoot this month that took three days and three different locations for three different themes. It was one of my bigger productions requiring the services of two makeup artists, a new GRIP who doubled as a posing/expression coach and some of the nicest location people I've dealt with in a long time. Now those of you that are veterans of the lens know the value of your support staff and for me with my disability it's doubly important that my support crew are top of the line. This article is to post the accolades of the behind the scenes staff on this shoot.
Let me start with Tree Valero as chief MAU and the talented Belynda Ramos MUA & Airbrush Artist as our on site cosmologist. I could never have done this without the talents of Belynda, and her patience and dedication to getting the right look for the shot. She really went above and beyond by remaining on site well past the contracted time, redoing the hair style multiple times and more "touch ups" in the heat then I can count. If you need a TOP SHELF MUA I can recommend no one better then Belynda:
Belynda Ramos
belr23@gmail.com
832-746-3244
Belynda is a certified makeup & airbrush artist and specializes in on location shoots. She took the time to listen and understand not only the client's wants but also my wants and needs for the picture at hand. Belynda has earned her spot as my permanent MUA and I'll be recommending her talents to ALL my clients!
On this shoot I was in a panic as my regular GRIP/Creative Director could not be with me. Ms. Tiffany I miss you! Instead I hired a young lady I've known for years. Truthfully, since she was a kid in high school and is now attending Sam Houston State majoring in theater, Cheyenne Ayla James. I first considered Cheyenne as a stand in makeup artist to do some little touch ups during the boudoir session but when I needed a full time GRIP she stepped up to the plate and performed flawlessly!
Those of you from the Houston area may know Cheyenne from her numerous stage appearances. Yes, she's a singer and has been performing since she was three! In high school she was in theater with my oh so beautiful and talented daughter. They often proclaimed together "She's my sister from another mother!" Allison taught Cheyenne how to scream on stage :) When it became apparent that the client was going to need more help in posing and expression to get the right look Cheyenne was there to take the client in hand and demonstrate the proper pose and facial expressions. The client loved her and as a GRIP she was excellent. Her years of stage performance gave her the ability to be comfortable around the lights and the difference lighting strategies. What she didn't know about cameras and lens she picked up quickly.
With my Creative Director moving further down south I'm comfortable knowing Cheyenne is a call away, as long as she's not performing or in class that is! Since the shoot Cheyenne has come out to the studio for a shoot of her own and after working with her I'm convinced she has what it takes to be a top producing model! So photographers if you want her to pose contact me directly and I'll see what I can set up for you.
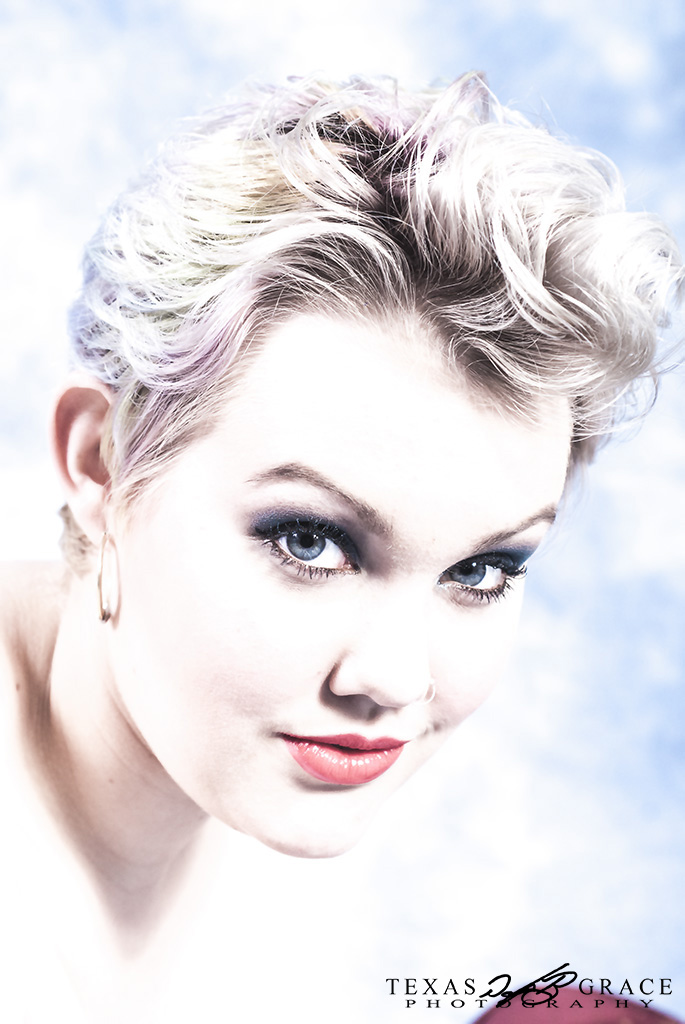
Amber Springs, Montgomery, Texas! Linda, THANK YOU! Amber Springs is absolutely beautiful and a joy to shoot in. Amber Springs is a wedding venue but the owner Linda was kind enough to open the venue to us to shoot both in either hall and on the manicured and landscaped grounds! When I forgot my extension cords and couldn't get the lights where I needed them Linda was quick to provide extension cords so I could get the shot! Check them out at http://thespringsevents.com/amber-springs.html
If I was getting married again it would be here at Amber Springs, in Montgomery. And speaking of getting married I want to mention their staff photographer Joey Brown. Now I didn't get the chance to meet with Joey myself, but Linda was kind enough to show me his body of work created at Amber Springs and it's wonderful. How often have you heard one photographer tell you to call another cause he's that good? If you are getting married call Joey Brown!
I'll close with Hotel Icon downtown Houston http://www.hotelicon.com/. As you probably know I disdain shooting in hotels. If you are a photographer and shoot in hotels, well I had doubts. But after shooting in the Hotel Icon I changed my mind about hotel shooting. Alright we WERE in the penthouse but when I went to visit the hotel and told the manager what we were doing she showed me the three types of rooms she though would lend themselves to a more upscale and classy setting. She pointed out the 12' ceilings and window light and even suggested some public areas that might be appropriate, if not in use at the time. I can not say enough about the rooms or the staff at Hotel Icon. If my budget ever allows for it I'm shooting there again. Hey, guys the Valet will unload your gear and haul it up to the room for you as well as pack it back in your car when your done!
In the end we had three days of shooting spanning 16 and a half hours of camera time resulting in over 900 images. Did I go over contract? SURE DID but the client was happy that I did and gave a bonus at the end! The shots we got are breath taking and I could not have done it without my support staff. So fellow photographers be kind to your MUAs and GRIPs and when you find ones as dedicated and hard working as Belynda and Cheyenne keep them close!!
End of ArticleShe'll Give You Her Heart
Posted on by DouglasB
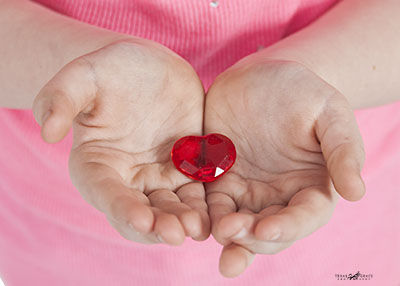
Last month I was hired to shoot some maternity/family portraits for a returning client. Normally for these types of shoots I’ll have a few standard poses but then let the family just “Play Around” and it is those shots that ultimately wind up being the favorites of the family as well as my own. Family portraits are hard on small children. They just want it to be over. During this shoot I gave the client's daughter a small, plastic, crystal heart since I saw her eying the bowl they were in.
Then it hit me “She is giving her heart to her mom!”. The picture below is the RAW image and when I was reviewing it a few days later I knew it wasn’t what I had seen in my mind at the time. TA-DA Photoshop to the rescue? Well, sort of but that’s not the whole story. First I ran it through Portrait Pro Studio 11 as I wanted a very specific look to the skin. Then I processed it using two different processes from Topaz Labs to get the coloring and soft focus look I wanted and lastly, I used some of Photoshop’s healing and content aware tools to do some fine cleanups and replaces.
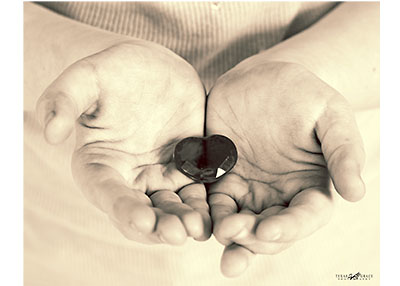
Final Image
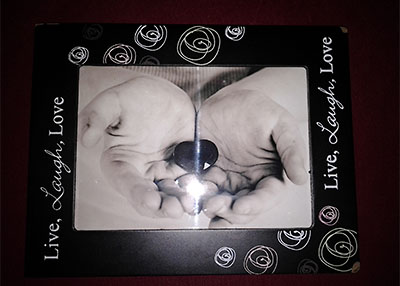
The final image was then cropped to print as a 5x7 print. I caution newer photographers and hobbyists about the importance of proper cropping. As we learned in last week’s lesson cropping can change the entire perspective of the image. When I deliver proofs to clients I deliver everything as a 8x10 crop, even if that means there will be “white space” on top, bottom and/or both sides. Look carefully at the final image to determine what “white space”, if any, enhances or detracts from the image. Make the print size fit the image instead of the image fit the print size. If the client wants a full bleed 8x10 image that sometimes means the image needs to be cropped 8x10 BUT printed 11x16 and trimmed. This is important and what will separate you from those people selling iPhone photography. (As you'll see in the last image my smartphone doesn't take great snapshots regardless of what the commercials sell you.)
Boudoir vs Glamour
Posted on by DouglasB
What makes one picture be labeled a “Glamour Shot” and another picture be labeled a “Boudoir Image”? Quite often the answer is that he who is viewing the picture is making that distinction. Here we have the EXACT same image as both boudoir and then as glamour. The difference here is how the image is cropped. I know they look different don’t they? You’ll just have to trust me that they ARE the same image.
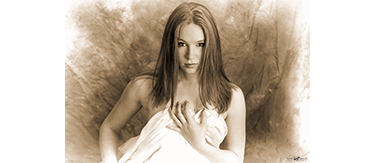
In this boudoir image the viewer sees the whole picture. The placement of her arms and hand, the bare shoulders, the sheet held against her chest, the whole woman is the focus of the picture, all of these things work in harmony to invoke a feeling of sensuality and desire in the viewer. It is this ability to evoke feelings of sensuality and desire that make this picture boudoir. So often people, and to a greater extent society, will make a snap judgment without stopping to consider the alternatives. I agree there is a lot of pornography out there but there is nothing about the image that is even suggestively erotic. The whole purpose of boudoir photography precludes erotica. Boudoir photography is a sensitive, sensual representation of a woman portraying her love and desire for her man. What can be better than love? After all John Lennon said it best, “All you need is love.” Who am I to argue with that?
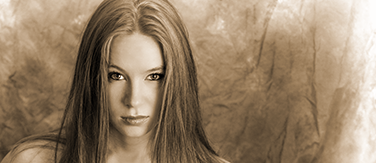
In this glamour image we have changed the viewing perspective. This is a close head and shoulder shot of the same woman. In fact it is the same image as the boudoir image above just cropped differently. BTW we call this technique of cropping a picture to create a whole new image “Merit Making”. The viewer’s focus is now drawn into the woman’s face and specifically her eyes. I moved her off center leaving empty background to her left. This makes the viewer’s mind attempt to “fill in” this empty space with something and more times than not it’s an emotion, a feeling and the feeling will be different for each viewer. One viewer may look at this image and see a powerful woman with determination and drive. The empty space will be filled in by the viewer’s mind with an appropriate motivational theme. Another viewer may see a slightly mischievous woman and still another total innocence. In each case the viewer’s mind will make the determination.
So what have we learned here today? We have hopefully learned that a picture is more than a picture depending on who is viewing it and under what circumstance. We have hopefully learned that art like beauty is in the eye of the beholder. And last but not least I hope we’ve learned that great photography is an art form and art cannot be rushed.
End of ArticleWorking on the site
Posted on by Admin DouglasB
I'm working my butt off trying to get this new site up and running while still completing all the client work. Bear with me people I'm running as fast as I can.
End of Article
